Guides
Part of Smartphone buying guide: a needs-first framework
Setting up and caring for a smartphone from day one
Set up and care for a smartphone with verified updates, account recovery, backups, privacy checks, battery habits, physical protection, and a repair record.
What to take away
- Record the phone, seller, warranty, IMEI, and condition before moving personal data.
- Update first, then set a strong screen lock and account recovery on iOS or Android.
- Restore selectively through iCloud, Google One, or Samsung Smart Switch, and confirm that contacts, photos, messages, and authenticators work.
- Charge with USB-C Power Delivery or Qi wireless gear from a known maker, and keep the phone out of heat.
- Keep backups, Find My or Find My Device, and repair records ready for loss, damage, or repair.
Care begins during setup. The safest way to set up and care for a smartphone is to start before the first sign-in: the first hour is when an owner can document condition, reject a wrong model, establish recovery, and avoid carrying years of unwanted settings into a new phone, whether it runs iOS or Android.
1. Inspect before signing in
Check the box, exact model, storage, color, serial number, and IMEI against the order. Photograph the phone in good light. Inspect the frame, camera glass, screen, buttons, ports, SIM tray, and seals before adding a case. For a second-hand phone, run the fuller used smartphone inspection before anything signs in.
Day-One Inspection Checklist
- Check box, model, storage, color, serial
- Photograph phone in good light
- Inspect frame, camera glass, screen, buttons
- Check ports, SIM tray, seals
- Power on, confirm expected setup screen
- Keep package until return period ends
Power it on. Confirm it reaches the expected setup screen without asking for a previous owner's account. A locked iPhone shows Apple's Activation Lock, and a wiped Android that still demands the previous Google account is protected by Factory Reset Protection; either one means the seller has not released the phone.
If the phone is sold as new, question existing user data, repair history, or activation. Keep the package and delivery record until the return period ends. Model, storage, and support expectations were set in the smartphone buying guide. Day one is when you verify them.
2. Establish a clean software baseline
Connect to a trusted network, then install the current operating-system and security updates: iOS on an iPhone, Android on most other phones, and the maker's own system where one is used.
Clean Software Baseline Steps
- Connect to trusted network
- Install current system and security updates
- Turn on automatic updates
- Restart if instructed
- Recheck until no update remains
- Update built-in apps via official store
- Record OS version, patch date, support end
The NCSC's advice on installing the latest software and app updates is blunt: apply updates to apps and device software as soon as available. That protects you from malware, and you should turn on automatic updates where that setting exists. Restart if instructed, then check again until no applicable update remains, and update built-in apps through the official store.
Record the operating-system version, the security patch level or build number, and the date the maker promises updates will end. An update failure on day one is a reason to investigate model, storage, network, and seller claims before migrating everything.
3. Secure the owner account
Use a unique password for your Apple ID or Google Account, and set a strong screen lock: an alphanumeric PIN or password rather than a short numeric passcode. Add the account recovery methods you control, save the recovery codes somewhere other than the phone, and set up an authenticator app such as Google Authenticator or a hardware security key. Turn on biometric unlocking only after the fallback code is stable and remembered.
Owner Account Security Checklist
- Use unique account password
- Set strong screen lock
- Add recovery methods you control
- Save recovery codes separately
- Configure biometrics after fallback code
- Turn on device-location and remote protection
- Test sign-in from another trusted device
Turn on Find My on an iPhone or Find My Device on Android. Review what it can locate, lock, erase, or display, and confirm that the phone appears in the account. Test sign-in from another trusted device without erasing the phone.
4. Move data in stages
Start with contacts, calendar, photographs, messages, notes, and essential files. iCloud or a direct device-to-device transfer covers most of that on an iPhone; Google One backup, a cable transfer, or Samsung Smart Switch covers most of it on Android. Confirm counts and open representative items, then install only the apps you still need from the official App Store or Google Play.
Staged Data Migration Steps
- Move contacts, calendar, photos, messages, notes
- Confirm counts and open representative items
- Move applications from official store
- Handle authentication, banking, wallets, health
- Do not erase old phone until new one works
Handle authentication apps, banking, wallets, transit passes, health records, work profiles, and encrypted chats according to their own transfer instructions. Do not erase the old phone until the new one can receive calls, recover accounts, and access the required data.
5. Review permissions and connections
Open the privacy dashboard — the App Privacy Report on iOS or the Privacy Dashboard on Android — or the permission manager. Check camera, microphone, location, contacts, photos, nearby devices, notifications, and background access. Give each application only the access needed for its current function.
Permissions and Connections Review
- Open privacy dashboard or permission manager
- Check camera, microphone, location, contacts
- Limit app access to current function
- Review Bluetooth, networks, VPNs, admins
- Remove unknown or obsolete entries
- Set short automatic lock time
- Decide lock screen content
Review Bluetooth pairings, saved networks, VPNs, device administrators, accessibility services, keyboards, profiles, and certificates. Remove unknown or obsolete entries. Set a short automatic lock time and decide what content may appear on the lock screen.
6. Build a tested backup
Turn on the backup service for your platform — iCloud Backup on an iPhone, Google One backup on Android — note what each one covers, and run it. Some app data, downloaded files, authenticators, and media folders, such as WhatsApp or Signal history, need their own export. Open the backup status and record the completion time.
A backup is useful only if recovery is possible. Confirm the account password, second factor, recovery code, encryption key, and access to the destination. Keep an independent copy of irreplaceable files when practical. A verified backup is also the first requirement when you later prepare the phone for repair.
7. Set battery and charging habits
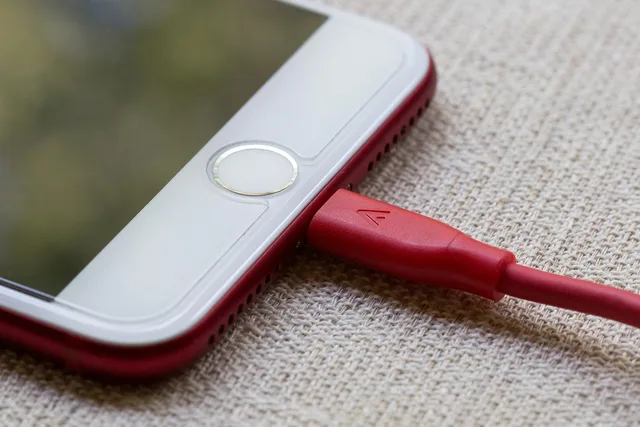
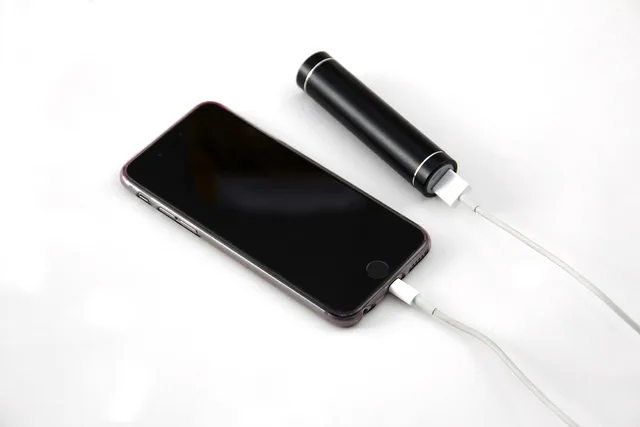
Use compatible, undamaged cables and adapters, and prefer ones rated for USB-C Power Delivery from a known maker. A Qi wireless charger is convenient but adds heat, so use it on a hard surface rather than under a pillow. Keep connectors dry and free of packed debris, do not charge under bedding or in a hot vehicle, and remove a case if the maker directs it during heat or charging troubleshooting.
The chemistry rewards those habits. Wikipedia's lithium-ion battery article reports degradation is strongly temperature-dependent: it rises when cells are stored or used hot, and cells kept hot or at a high state of charge often lose capacity faster.
Daily runtime and total service life differ. Screen and radio settings shape the first; heat and charging habits shape the second. Battery Health & Charging on iOS shows maximum capacity and peak performance capability, while Android's battery screen and apps such as AccuBattery show capacity estimates, discharge rates, and charging history.
Where the phone offers charging controls, turn them on: Optimised Battery Charging on iOS, Adaptive Charging on Android, or a charge limit that stops before a full charge. They shorten the time the battery spends held at a high state of charge, which is where heat and aging do most of their work.
Avoid treating every short day as battery failure. Signal conditions, screen use, navigation, cameras, background work, updates, and temperature can all change consumption. Review the battery usage report in Settings — the iOS Battery page or the Android battery usage screen — across several representative days before blaming the cell.
8. Protect without hiding faults
Choose a model-specific case that leaves microphones, vents, cameras, buttons, antennas, and charging features unobstructed, and prefer one with raised edges around the screen and camera. Add a tempered-glass or film screen protector if you want one. Check that touch, proximity sensing, cameras, biometrics, and wireless charging still work after fitting both.
Keep the phone away from keys, grit, pressure, edges, and extreme temperatures. Water resistance is not an invitation to expose the phone to liquid, and it can change with age or repair. Follow the maker's cleaning instructions instead of using household solvents or compressed air. The tablet and e-reader care routine extends these habits to bigger screens.
9. Keep an ownership record
Save the receipt, warranty, serial number, exact model, support promise, carrier lock information, and repair history. Record battery-health readings — the iOS Battery Health & Charging figure or an Android capacity estimate — when available, not just when a problem appears. A dated baseline helps distinguish sudden change from gradual aging.
Before any repair, make and verify a fresh backup, photograph condition, remove cards as instructed, and agree on data access and erasure. Then weigh the available repair routes before choosing a counter: the maker's authorized service or mail-in program, an independent repair shop that can source genuine or quality aftermarket parts, or self-repair with guides and parts from the maker or a parts supplier.
Common questions
Should I restore every app from my old phone?
No. Restore needed data first, then install current apps that you still use.
Is charging overnight always harmful?
Follow the maker's charging controls — Optimised Battery Charging, Adaptive Charging, or a charge limit — and its heat guidance. Temperature and time spent at a high state of charge can matter, but modern behavior varies by model.
When can I erase the old phone?
After the new phone is tested, essential data and authenticators are available, accounts can be recovered, and a separate backup exists.
How often should I check backups?
Check after setup, after major data changes, before travel or repair, and on a regular schedule suited to the cost of losing new data.